How to Build Inexpensive Walls for USPSA and IDPA
Creating affordable walls for IDPA (International Defensive Pistol Association) and USPSA (United States Practical Shooting Association) matches can be a game-changer for your range or practice area. In this blog post, we’re diving into the world of DIY projects to show you how to build cost-effective walls for your stages. Whether you’re a range owner, a competitive shooter, or just a shooting enthusiast, these walls are not only budget-friendly but also easy to construct and durable for regular use. We’ll cover the materials you need, step-by-step instructions, and some pro tips to ensure your walls stand up to the test while keeping your expenses low. Get ready to enhance your shooting experience without breaking the bank!
Disclaimer: This blog post may contain affiliate links. This means that if you click on one of the product links and make a purchase, I may receive a small commission at no extra cost to you. This helps support my blog and allows me to continue to create content. Please note that I only recommend products or services that I personally use and believe will add value to my readers. Your support is greatly appreciated.
Table of Contents
Materials Needed
To build each wall, you’ll need the following materials:
| Item Description | QTY | Approximate Cost |
| 2 in. x 2 in. x 8 ft. Furring Strip Board Lumber | 5 | $15.00 |
| 2″x10′ PVC Sch 40 Pipe | 1 | $16.00 |
| 2″ Hub PVC 90-Degree Elbow | 2 | $5.00 |
| 1-1/2″ x 1-1/2″ x 1-1/4″ Triple Zinc Joist Angle | 4 | $3.50 |
| Snow Fence (Typically sold in 50-100′ rolls). Need 8′ per wall | 1 | $6.00 |
| 10″ Shank Common Spike Nail | 4 | $3.00 |
| #8 x 1-1/4″ Phillips Drive Stainless Steel Pan Head Sheet Metal Screw | 16 | $4.00 |
| #9 x 3″ Flat Head Exterior Deck Screw | 4 | $0.50 |
| Total | $53.00 |
Other Items & Tools Needed
You’ll need to make sure you also have these tools and other items I’d expect you have:
- Staple Gun
- Staples
- PVC Cement & Primer
- Drill / Driver Bit(s)
- 1/2″ Drill Bit
- Saw / PVC Tubing Cutter
Making the PVC Legs
Overview
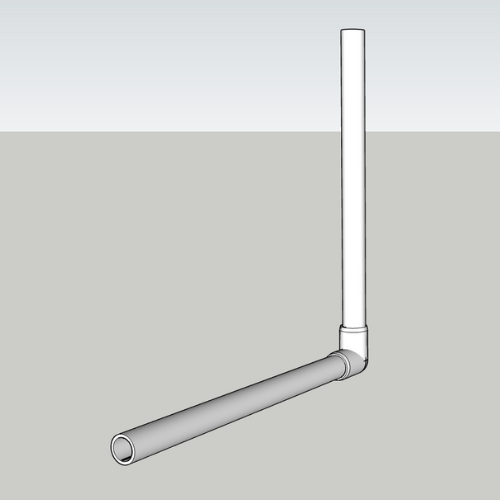
The 2″ PVC pipe you purchased is in 10′ lengths and per wall, you will need two legs and two uprights. I’d recommend cutting these into 24″ pieces. If you are only building 1-wall, this will leave you with one extra 24″ piece, but my guess is most people reading this are looking to build many, so these extra 24″ pieces won’t be wasted.
Steps
- Cut the PVC into 24″ pieces
- Using your PVC primer, prime the end of each PVC leg you just cut as well as the inside of the elbows
- Cement in the PVC legs to the 90-Degree elbows
When our club built these, we had someone cutting PVC, someone priming and someone assembling to help expedite the process.
Pro Tip
Like most match directors, I love tools. I picked up this PVC tubing cutter from Ryobi to cut the PVC for these wall legs, and also for our target stands. Cutting PVC with a saw is messy and gets PVC dust everywhere. This tubing cutter is the way to go!
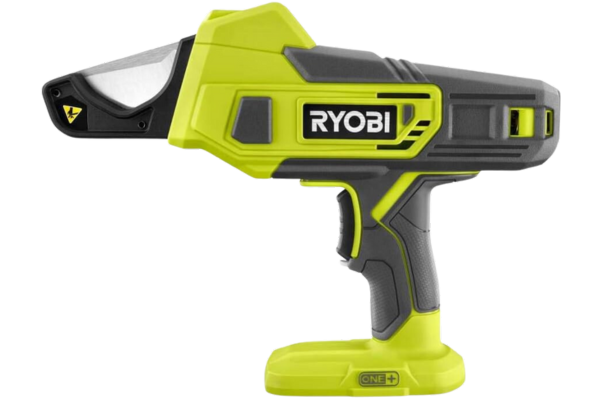
Ryobi 18-Volt ONE+ Lithium-Ion Cordless PVC Cutter Shears
Make the Walls
Overview
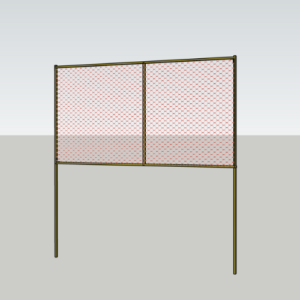
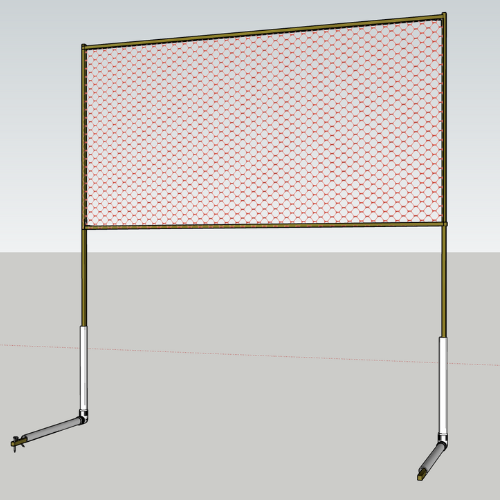
The walls we built will be 6′ tall, and 8′ wide. This is a very common dimension. You can follow similar instructions and change your dimensions to build 4′ wide walls and also some barricades as we’ve done. The legs are interchangable which is the beauty of this model.
Steps
- Cut two of the 2″x2″x8′ boards down to 6′ in total length. KEEP the two 24″ cutoff as we’ll be using these later.
- (OPTIONAL) Cut one of the 2″x2″x8′ boards down to 45″ in total length. The remainder of this board isn’t used if you are making only 1 wall.
- Assemble the wall using the 6′ Boards as the uprights. The 8′ boards are the horizontal supports and go inbetween the 6′ uprights. Use the 3″ screws for this. The very top of the wall and the very bottom of the horizontal support should be 4′ wide to accomdate your snow fence.
- (OPTIONAL) Add the 45″ board in the middle of the wall for additional stabilty.
- Install the joist angle brackets in each corner using the 1 1/4″ pan head screws to give the wall support. You can use wood corner braces or similar for this. I prefer the metal angle brackets as the walls stack together tights with the interal corner brace.
- Lay the wall flat on the ground and roll out your snow fence to it. Staple it from one side to the other to make sure it stays tight.
- The wall is complete.
Pro Tip
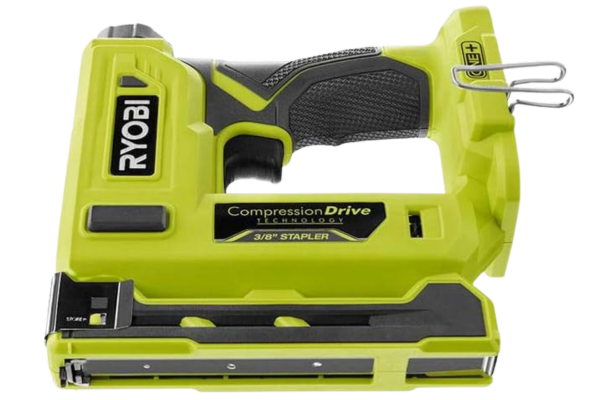
As mentioned in the BLACK FRIDAY 2023 – 5 MUST-HAVE ITEMS FOR MATCH DIRECTORS blog post, all of our club members and our setup crew love the Ryobi Cordless Stapler. This really helps make quick work of stapling the snow fence to the walls.
Make the Wall Legs
Overview
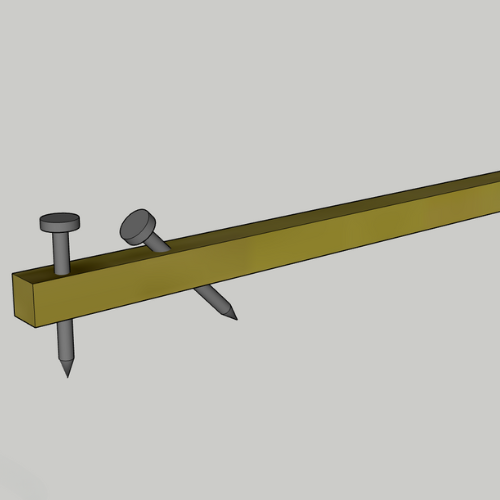
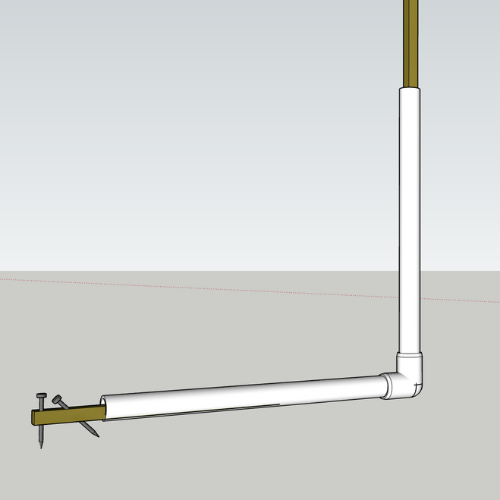
The legs for the wall will use the 24″ cutoffs from the wall upright legs. In this step, you’ll only need to drill two 1/2″ holes for the spikes. One will go straight through and the other will go on a 45-degree angle. The 45-degree angle will really help make sure the wind doesn’t pull on the wall. With the spike in on this angle, the spike would have to tear out of the ground to have the wall pull out. It is harder to tear out of the ground than to pull straight up. We’ve had some VERY windy matches and these hold up well; even with our sandy soil.
Steps
- Drill 1 hole straight through about 2″ from the end.
- About 5″ to 6″ in from the end of the board on a 45-degree angle toward the long end of the stick.
Put it all together
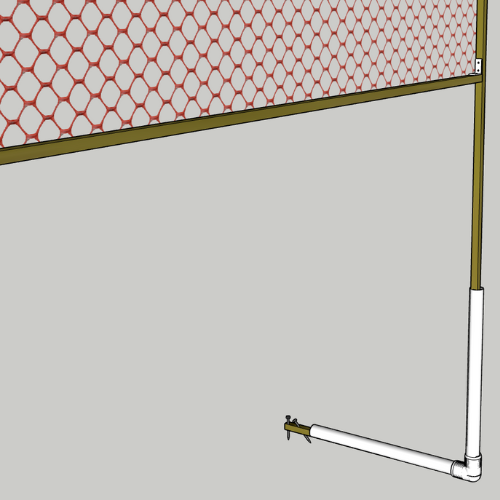
Okay, you are all done. Now it is time to just put it all together. Here are some more illustrations of what the finished product will look like.
During setup, if you have one leg pointed in opposite directions, you can mock up the stage without nailing in the wall.
We also use 6” Bungee Ball Cord for added stability and to tie walls together. This makes for quick setup and tear down versus screws or similar.
Conclusion
In wrapping up, this guide aimed to provide a simple the process of constructing cost-effective, sturdy walls for USPSA and IDPA matches. The simplicity and affordability of this DIY approach make it an ideal solution for match directors and clubs, ensuring that you can set up practical shooting events without straining your budget or burning out your staff.
As you embark on this project, remember that the beauty of DIY lies in customization. Feel free to adapt these instructions to fit your specific needs and space constraints. And, while we’ve covered the basics, don’t hesitate to get creative – your modifications could be the next big improvement in practical shooting setups!
I encourage you to share your experiences and any innovations you discover along the way. By exchanging ideas and improvements, we can collectively enhance our shooting sports community. If you have any questions, suggestions, or insights from your building experience, please reach out on our contact page or leave a comment below. Your feedback not only helps us improve but also aids fellow match directors in their journey. Let’s build together and keep the spirit of practical shooting thriving!
Lastly, If you found this post helpful and would like to support my work in creating more content like this, consider leaving a small donation. Your generosity helps keep this blog alive and thriving, and is greatly appreciated!